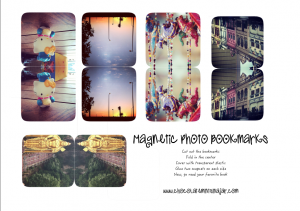
I love reading, but I probably love bookmarks and collecting them just as much. Apparently my little girl loves these things too. She is almost 6 now but she will always grab my books, pretend to read them and then take my bookmark. And I don’t like losing my place in a book.
After a little bit of googling I found printable magnetic bookmarks on The Pretty Blog and made some for myself. If you know me or if you have been following long enough you will know that I just can’t leave things alone. For example I just can not follow a recipe, I need to add something else or take away something that should be in there. So, naturally I felt that I could make some of my own using some of my favorite photographs from my Instagram account. It made sense to use instagram because the pictures were already squared.
You can make your own, it just takes a little photo editing. Or you can download the one I made.
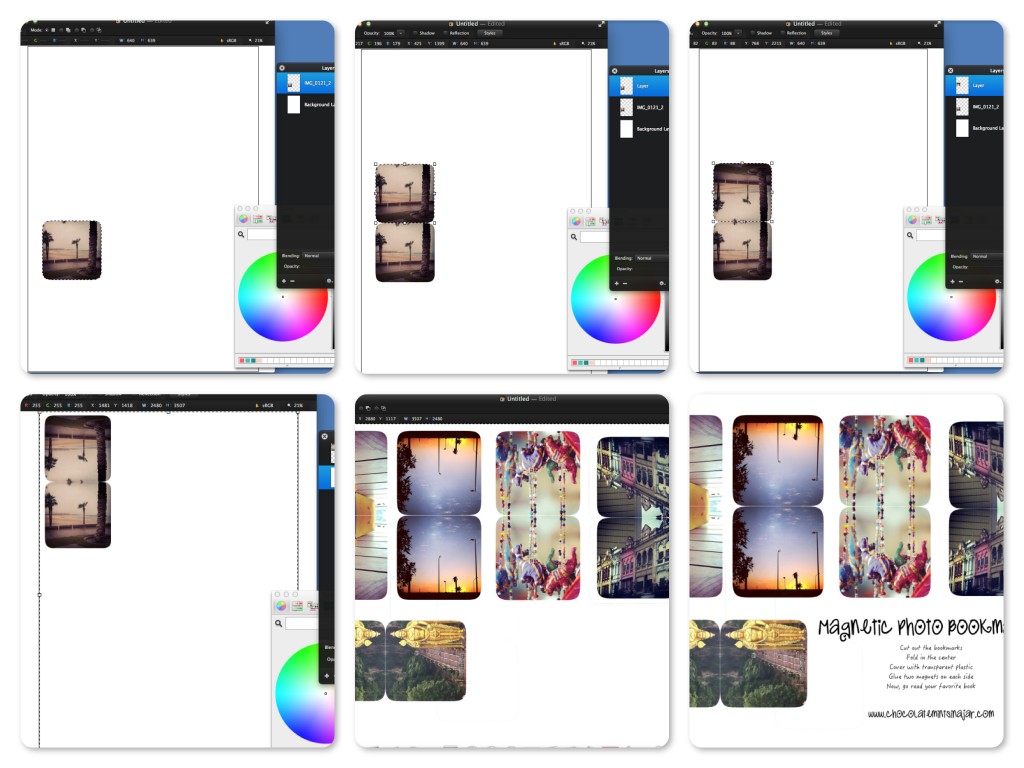
I don’t have a specific tutorial because it will all depend on what software you will be using, but here are the basics:
- Resize your images (square them first if they aren’t square) to 4.5 – 5 cm, I found that this is a good size.
- Round the edges of the image. I use pixelmator and you select the image, then select Refine Selection.
- Copy the image and paste another copy of it on the top edge of the image.
- Flip it vertically
- Now move it in an empty place so you can add more.
- Keep going until you have all the bookmarks you want/need (not like a girl could ever have enough bookmarks)
Once you have your file ready print it on heavy cardstock
Cover it using clear plastic contact paper. You don’t have to, but this makes them more durable.
Cut each one out, making sure you cut the round corners at the top as carefully as you can. Fold along the center where the two images meet.
Glue a magnet on each side. I have these really thin, flat, square, self adhesive magnets that I find at my local stationery store.
Keep going until you have wonderful bookmarks that won’t fall out of your book. Now go read a good book.


